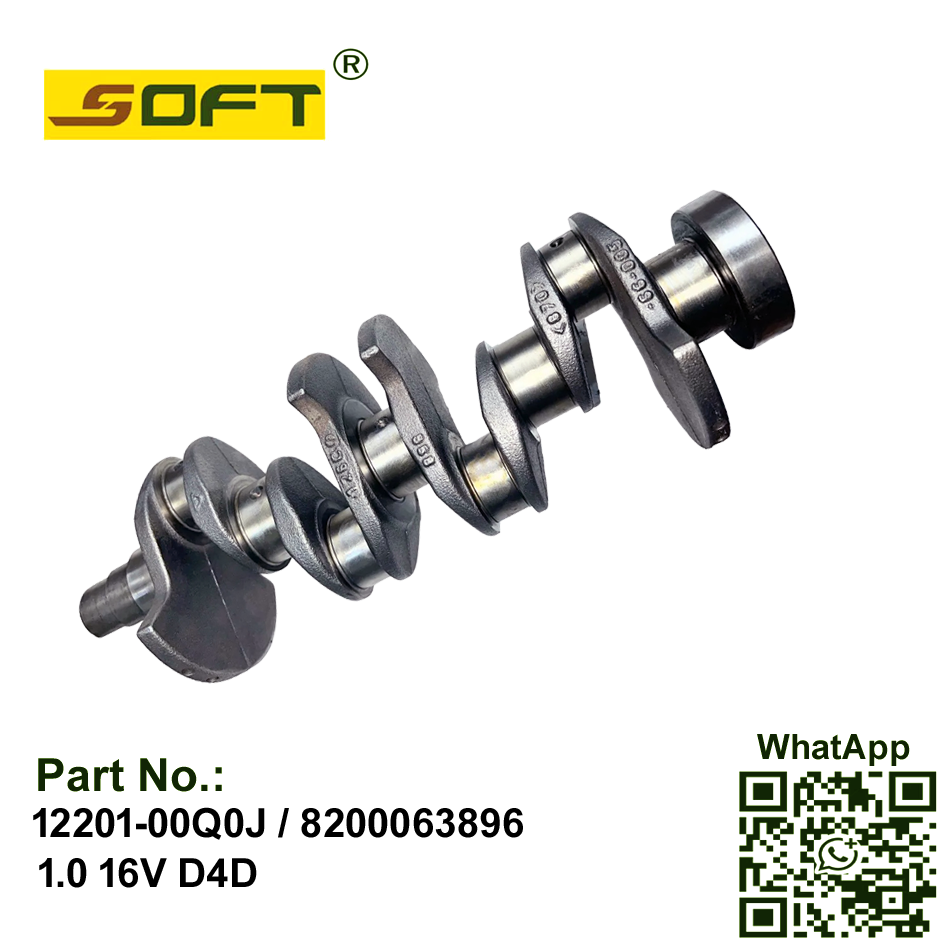
Rebuilding a motor successfully comes down to one uncompromising truth. The rotating assembly must be flawless. At the literal center of this mechanical system sits the primary rotating shaft. Whether you are managing a high-volume rebuilding facility or tackling a complex teardown in your home garage, achieving correct fitment is non-negotiable. Mechanics share a universal golden rule for the lower block. Drop it in right the first time, or prepare to tear the heavy iron down all over again.
This technical guide breaks down the mandatory steps for diagnosing wear, selecting replacement parts, dialing in exact machining tolerances, and executing a foolproof installation. By utilizing a high-quality Nissan engine crankshaft and strictly adhering to factory clearances, builders ensure long-term reliability. A properly blueprinted rotating assembly forms the bedrock of engine longevity, turning standard repairs into high-mileage successes.
Key Takeaways
Precision is Everything: Exact measurements for main and rod journals dictate oil pressure. Even a thousandth of an inch deviation leads to spun bearings.
Material Selection: Choosing the right component depends entirely on the application, balancing daily commuter needs against heavy-duty or forced-induction demands.
Surgical Preparation: Thorough block cleaning, precise Plastigage verification, and generous component lubrication are foundational steps before torqueing any bolts.
Hardware Rules: Reusing stretched main cap fasteners is a guaranteed path to failure. Always follow factory torque sequences with brand-new hardware.
Industry Trends in Engine Rebuilding
Recent shifts in the automotive aftermarket highlight a massive surge in vehicle life extension programs. With new vehicle prices climbing and supply chains remaining unpredictable, both consumers and commercial fleets are pushing internal combustion engines far beyond their original intended life cycles. This macroeconomic trend means rebuilding programs are no longer just about basic patching. They require meticulous precision.
Specifically, machine shops are focusing heavily on exact lower-block tolerances to reduce costly warranty claims and handle higher mileage demands. Because modern oils are thinner and factory tolerances are tighter than ever, getting the rotating assembly perfectly aligned is now the defining factor of a profitable and reputable rebuild operation. There is zero room for guesswork in today's engine bays.
The Critical Role of the Rotating Assembly
To fully grasp the stakes of a rebuild, we have to look at the violent forces occurring inside a modern internal combustion engine. The primary job of this heavy-duty steel or iron component is to convert the explosive, up-and-down movement of the pistons into smooth rotational torque. This energy transfers through the flywheel and transmission, ultimately driving the wheels.
Furthermore, this central axis endures immense mechanical stress, extreme thermal loads, and constant friction during daily operation. Every time a spark plug fires, thousands of pounds of downward pressure slam directly onto the rod journals. Because of this harsh environment, builders prioritize structural integrity here above all else. If the central axis is compromised, the entire block is at risk of catastrophic failure.
Signs You Need a Replacement Component
Before ordering fresh parts, technicians must accurately assess the condition of the existing assembly. A quick visual inspection is rarely enough. Not all damaged metal can be saved by a trip to the local machinist.
Deep Scoring and Journal Wear
Deep scoring on the main or rod journals is the most frequent reason for replacement. This damage typically stems from oil starvation or contaminated fluid carrying microscopic metal debris. When the protective hydrodynamic oil film breaks down, metal-to-metal contact happens instantly. This leaves jagged grooves across the polished surfaces. If you can catch your fingernail on these gouges, the damage is severe. When the grooves are too deep to be safely machined out within the manufacturer maximum undersize limits, usually around 0.020 inches, the part belongs in the scrap bin.
Micro-Cracking and Structural Fatigue
In addition to surface wear, extreme heat cycles or previous bearing failures severely compromise the internal metallurgy. Professional builders use magnetic particle inspection, commonly known as Magnaflux, to detect microscopic cracks completely invisible to the naked eye. If structural fatigue is discovered around the oil hole chamfers or the critical fillets where the journal meets the counterweight, the integrity is permanently lost. Attempting to polish and run a cracked unit will inevitably result in a snapped shaft under heavy load.
Failed Runout Tests
A bent rotating assembly causes severe internal vibration, rapid bearing wear, and eventual block destruction. You measure this distortion by placing the ends on precise V-blocks and setting a dial indicator against the center main journal. As you rotate the metal by hand, the needle reveals any deviation from a perfectly straight axis. If the runout exceeds factory service limits and cannot be safely straightened without weakening the structure, replacement is mandatory.
Genuine OEM vs High-Quality Aftermarket Options
When replacement becomes unavoidable, mechanics face a familiar purchasing dilemma. Should they source a genuine factory part or turn to the aftermarket? Modern rebuilding programs are heavily investing in advanced metallurgical testing to validate aftermarket alternatives, ensuring non-OEM parts meet or exceed original standards.
For standard rebuilds aimed at restoring a daily commuter, genuine factory parts remain the gold standard. They offer perfect drop-in fitment and precise balancing right out of the box. In contrast, forged aftermarket options made from 4340 billet steel are vastly superior for forced induction builds or heavy-duty towing applications that push cylinder pressures far beyond factory limits. High-quality cast aftermarket options also serve as excellent, budget-conscious solutions for standard fleet repairs.
Feature
Genuine OEM
High-Quality Aftermarket
Material
Cast or Factory Forged depending on model
4340 Billet Steel or Cast Iron
Cost
Moderate to High
Low for Cast to Very High for Billet
Best Use Case
Standard rebuilds and daily driving
High-performance, heavy towing, budget builds
Fitment
Exact factory match
Requires precise metrology checks
Essential Specs and Tolerances for Fitment
Professional engine building is essentially an exercise in applied metrology. Establishing the correct microscopic tolerances separates a smooth-running motor from a ticking time bomb. This requires highly accurate measuring tools and a strict adherence to the service manual.
Main Journal and Rod Journal Clearances
Oil clearance is the incredibly thin gap between the journal surface and the bearing shell where pressurized fluid resides. It is imperative to match the Nissan crankshaft to the correct bearing sizes using precision micrometers. Take, for example, the popular Nissan March D4D 1.0 16V application. Sourcing a shaft with exact OE specifications matching reference numbers 12201-00Q0J or 8200063896 guarantees the main and rod journals are machined to drop-in tolerances. If the clearance is too tight, the bearing will rapidly overheat and spin in the saddle. If it is too loose, the motor suffers from dangerously low oil pressure and a distinct knocking sound.
Thrust Bearing and End Play Measurements
While main bearings handle vertical loads, thrust bearings control axial movement. This is the front-to-back shifting of the assembly within the block. Builders measure this movement using a magnetic dial indicator mounted directly to the iron or aluminum casting. By prying the assembly forward and backward, they read the exact end play. Proper clearance ensures the assembly does not walk, which would otherwise destroy the transmission input shaft or shatter the oil pump gears.
The Importance of Micro-Polishing
Even brand-new parts require proper journal polishing before installation. Micro-polishing creates a specific surface finish measured in Ra. This promotes optimal oil retention without acting like sandpaper against the soft, tri-metal bearing material. A properly polished journal ensures the protective oil wedge forms instantly upon the very first startup.
Step-by-Step Installation Process
Bridging the gap between theory and practice requires immense patience and surgical cleanliness. Adopting a strict protocol saves builders from agonizing mistakes. Grab your brake cleaner, lint-free towels, and calibrated torque wrenches.
Step 1: Block Preparation and Cleaning
Before fresh metal enters the workspace, the bare block must be immaculately clean. Scrape away all old gasket material, scrub out carbon sludge, and eliminate microscopic metal shavings left over from the cylinder honing process. Use high-pressure compressed air and specialized long-reach brushes to meticulously flush out every single oil gallery. A single grain of debris left behind will embed itself in a new bearing and score a pristine journal.
Step 2: Setting Bearings and Plastigage Testing
Once the block is spotless, carefully lay the upper main bearing halves into the saddles completely dry. Gently lower the heavy rotating assembly into place, taking care not to nick the thrust surfaces. Before final assembly, you must use Plastigage to verify your math. Place a small calibrated wax strip across each journal, install the main caps, and torque them to spec. Remove the caps and measure the crushed wax strip against the paper scale to confirm your oil clearances are perfect.
Step 3: Applying Assembly Lube and Final Torquing
After verifying clearances and gently wiping away the crushed wax, apply a generous layer of high-quality engine assembly lube to the bearings. This fluid has a tacky consistency designed to cling to the metal during the initial dry start. Reinstall the main caps for the final time. Always follow the standard inside-out spiral torque sequence specified in the manual, listening for the sharp snap of the wrench. This outward spiraling sequence ensures an even clamping force across the block, preventing microscopic bore distortion.
Common Pitfalls During a Rebuild
Even seasoned mechanics fall victim to rushed errors. Recognizing and avoiding these specific pitfalls guarantees your project survives its break-in period.
One of the most disastrous mistakes is reusing old main cap bolts. Many modern engines utilize torque-to-yield fasteners engineered to stretch elastically to a specific yield point. Once stretched, they permanently lose their tensile strength. Reusing them results in improper clamping force, leading to cap walk and eventual block failure. Always purchase brand-new hardware.
Another critical error is installing bearings dry or relying solely on standard 5W-30 motor oil for assembly. Standard oil slowly drains away into the pan over days or weeks, leaving the metal completely vulnerable during the first startup. A dry start causes immediate, irreversible damage in the crucial seconds before the pump primes the system. Generous application of specialized assembly lube is mandatory.
Finally, ignoring the oil pump is a recipe for instant regret. If the previous failure involved metal flakes circulating through the fluid, the pump housing and gears are deeply scored. Installing a pristine lower block always warrants a brand-new or rigorously inspected oil pump to guarantee adequate fluid volume.
Choosing the Right Parts Supplier
The success of your rebuild is directly tied to the caliber of the components you source. Finding a reputable supplier is just as important as your mechanical craftsmanship. Prioritize vendors who offer rapid shipping logistics, robust warranty coverage, and strictly verified fitment data. Engine operations run on tight schedules, and waiting for delayed shipments severely disrupts workflow.
Always encourage your purchasing team to verify OEM part numbers against the specific vehicle chassis and engine code. Sourcing a precise replacement crankshaft for Nissan from a trusted, transparent supplier eliminates frustrating variables. This allows builders to focus entirely on the precision of their assembly work rather than fighting incompatible dimensions.
Conclusion
A successful engine restoration relies almost entirely on the precise fitment and uncompromised quality of the primary rotating assembly. It acts as the literal backbone of the motor, bearing the brunt of combustion forces mile after punishing mile.
Take your time, keep your workspace surgically clean, and measure all bearing clearances at least twice. Invest in high-quality parts and brand-new hardware to ensure your freshly rebuilt block runs smoothly and powerfully for another hundred thousand miles.
If you are planning your next major teardown, do not compromise on lower-block integrity. Browse our extensive catalog at https://www.cndingjia.com to find the exact premium replacement components, master rebuild kits, and verified OE-spec parts tailored for your specific application. Contact our dedicated technical support team today for expert fitment verification before you turn the first wrench.
FAQ
How much does a replacement component cost?
The cost varies significantly depending on the specific vehicle model, engine displacement, and the type of material required. For common passenger vehicles, a standard cast replacement or a certified remanufactured unit typically ranges from $200 to $400. However, for heavier applications or high-performance models, a genuine OEM forged or specialized billet aftermarket component can cost anywhere from $800 to well over $2,000.
Do I need to balance the new rotating assembly before installation?
While new factory parts are usually pre-balanced to acceptable specifications right out of the box, professional shops strongly recommend dynamic balancing for the entire rotating assembly. Balancing the central shaft together with the specific connecting rods, pistons, rings, and harmonic balancer ensures maximum longevity, drastically reduces parasitic vibration, and optimizes high-RPM performance.
Can I reuse my old main bearings?
No, this is absolutely never recommended under any circumstances. Bearings wear specifically to the microscopic profile and slight imperfections of the old journal surfaces. Introducing a freshly machined component requires brand-new bearing shells to establish the proper, uniform oil clearances necessary to maintain a reliable hydrodynamic oil film. Reusing old, grooved shells will almost certainly lead to rapid failure.
What is the standard oil clearance?
Standard clearances vary widely depending on the specific engine code and its intended use. Heavy-duty, large-displacement V6 engines have different specifications than smaller, high-efficiency four-cylinders. Generally speaking, main and rod bearing clearances usually fall between 0.0010 and 0.0020 inches. Builders must always consult the specific factory service manual for their exact model to ensure accurate fitment.
How do you check end play on a Nissan motor?
Measuring axial movement requires a magnetic dial indicator mounted firmly to the bare block. You pry the main shaft forward and backward with a flathead screwdriver or pry bar, reading the exact travel distance on the gauge. Proper clearance keeps the thrust bearing intact and prevents the assembly from walking under load.
What causes the main rotating shaft to snap?
Catastrophic snapping usually stems from micro-cracking caused by extreme heat cycles, severe cylinder detonation, or running the motor with excessive runout. Once the internal metallurgy is compromised by a spun bearing or intense vibration, heavy torque loads will eventually shear the solid metal completely in half.
Ningbo Dingjia Auto Parts Co., Ltd. is a professional enterprise specialized in manufacturing engine camshafts, connecting rods, crankshafts, and carbon fiber modification parts.